Manually transferring transaction data is tedious and error-prone, especially when managing multiple platforms. Whether closing books or tracking expenses, it can be a real headache. You’ll feel the difference once your transactions sync seamlessly to your preferred accounting platform. There’s less stress with fewer errors with a workflow that just makes sense.
Why Accounting Integration Matters
No more drowning in endless manual data entry or untangling mismatched records that makes you want to pull your hair out. When it’s time to close your books, you’re buried in receipts, flipping between bank statements and spreadsheets, just trying to make sense of it all. It’s tedious, error-prone, and time-consuming. Real-time syncing changes all that by cutting out the manual hassle, reducing stress, and helping you close your books faster with fewer mistakes.
Instead of chasing down missing data or dealing with delayed reports, your transactions update automatically and accurately. You get clean, up-to-date records without extra work. With clear numbers always within reach, you can make smarter financial decisions and stay one step ahead. No more surprises and scrambling your way through everything. Just complete control.
What Swipey’s Accounting Sync Feature Does
Think of Swipey’s accounting sync as your shortcut to tidy, stress-free books. No more late-night spreadsheet marathons or chasing receipts around the office. It’s a smooth, automatic connection to your accounting software that just works.
During the accounting sync process, Swipey will show you:
- Expense categories
- Payment accounts
- Transaction amounts
- Who made the transaction
Everything flows neatly into your books, so you don’t have to stress about the details and focus on the bigger picture.
How to Get Started
Here’s a quick guide to help you sync your transactions to QuickBooks or Xero.
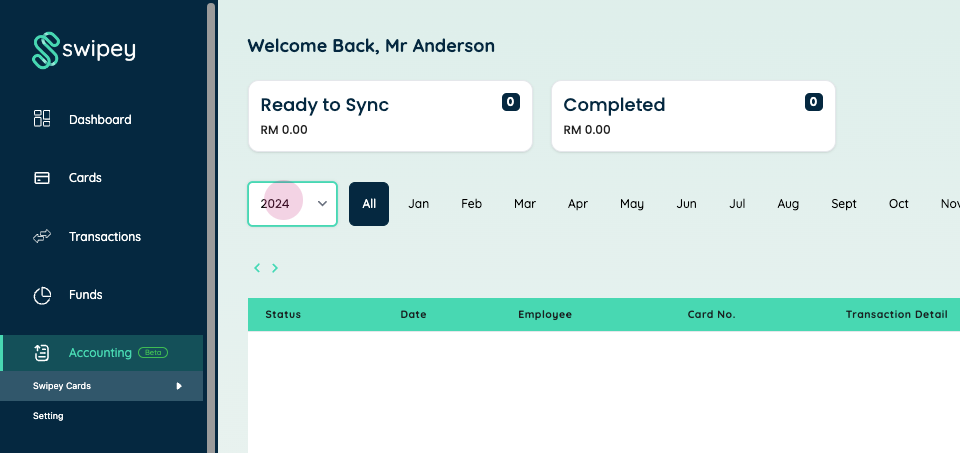
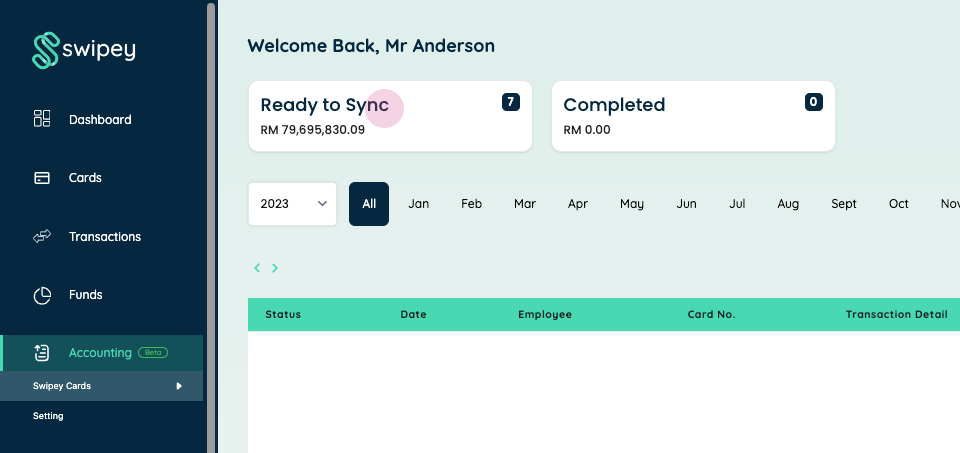
Step 1: Head to your admin dashboard and click on the Swipey Cards section.
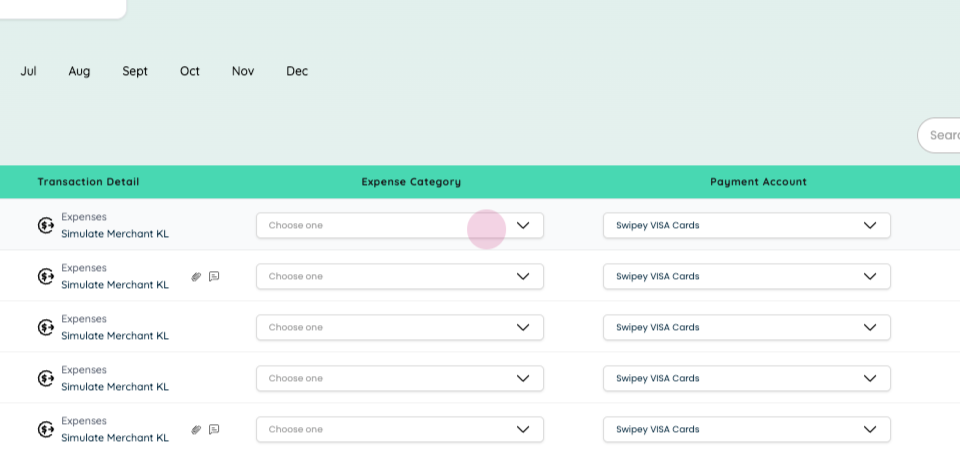
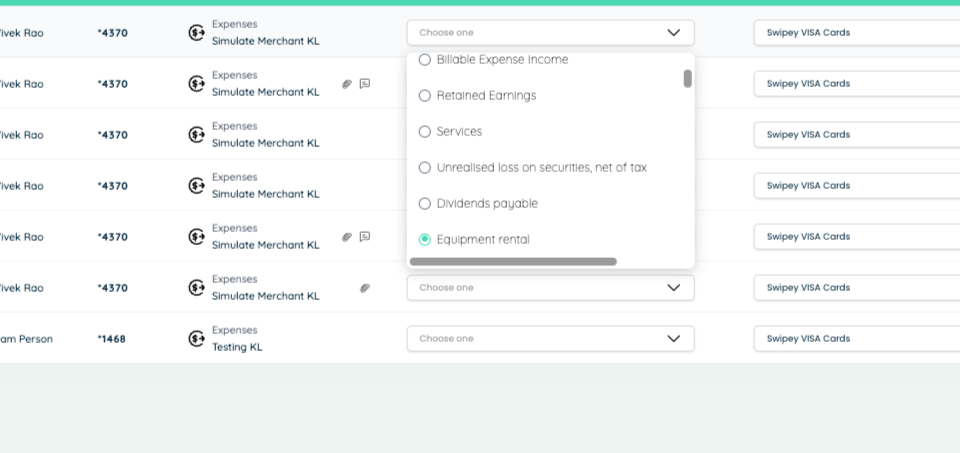
Step 2: Here, you’ll see all the transactions ready to be synced. Start by selecting an Expense Category for each one.
A list of options will appear, so for example, you can choose something like ‘equipment rental’ if it suits your transaction.
Step 3: Next, look to the Payment Account section located just beside it. Select the correct account for the transaction. If you’re managing expenses for a different user, make sure to link it to their dedicated account.
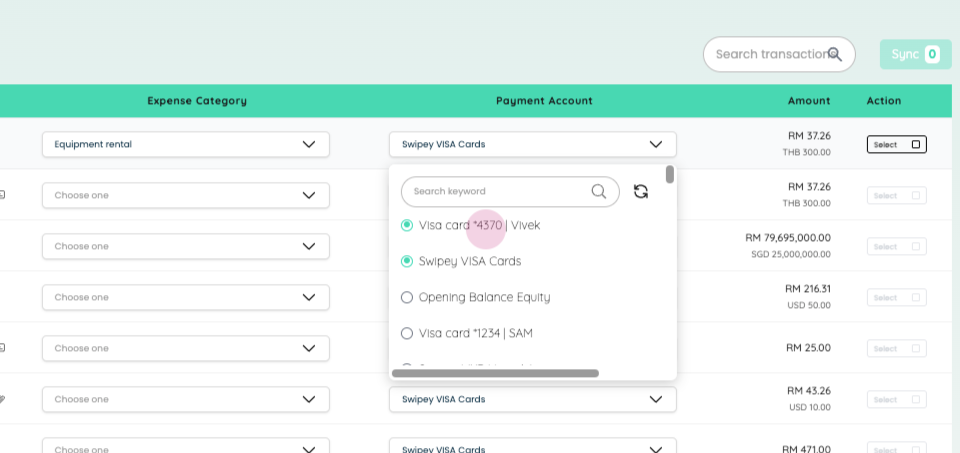
Step 4: Once everything is filled in, click the Select action button on the right. Choose the transactions you’d like to sync.
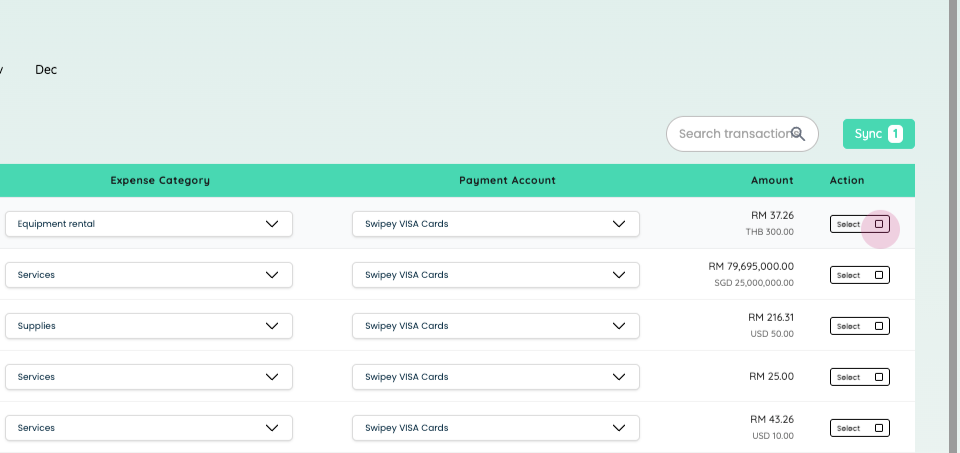
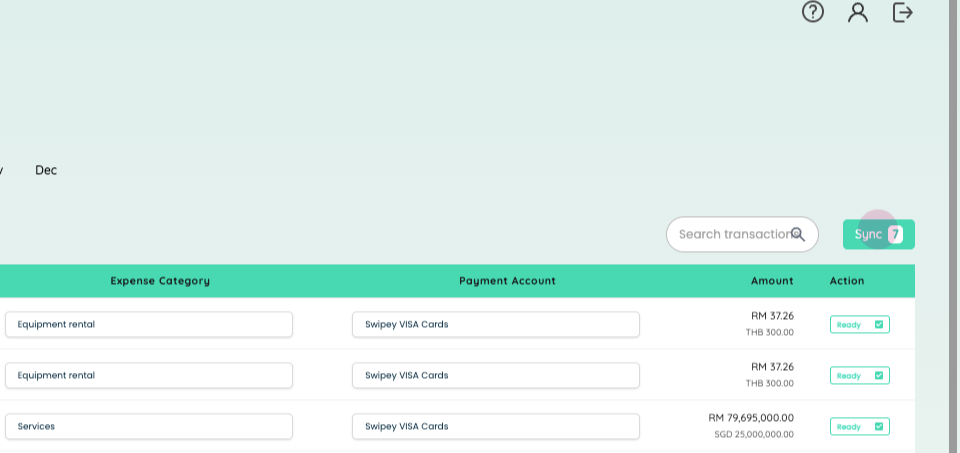
Step 5: After selecting the transactions, click the Ready to Sync button in the top corner.
Step 6: Double-check that all details are correct. Once everything looks good, click Sync.
Step 7: After syncing, you’ll be able to find the successful transaction under Completed.
Take the Next Step
Stop chasing receipts like it’s a full-time job. With seamless syncing, you’ll close your books faster, ditch the manual work, and actually have time for the fun stuff like growing your business. More time, less mess. Exactly how it should be. Say goodbye to those reporting delays and hello to a smoother, smarter way to manage your transactions.
Already using Swipey? Time to sync your accounts. New to us? Sign up and discover how simple reconciliation can be.
Co-authored by Dania Omar & Kristen Tegjeu-Carlos